How to Apply Flawless and Professional Makeup- On a Budget by Miss Delaware United States Taylor Demario
I am so excited to be featuring guest bloggers during the winter months! My first Guest blogger is Ms. Taylor Demario. Taylor is the gorgeous and super sweet Miss Delaware United States 2013! We have worked together several times and each time is truly a pleasure. You can check out Taylor’s last shoot with me HERE. We did a Dark fairy tale for Halloween and had a blast! It was a little cold but Taylor was a trooper! You can also check out Taylor’s last glamour shoot we did by clicking HERE. Follow me on Pinterest by clicking HERE and to see more ideas from Guest blogger Taylor about awesome makeup ideas on pinterest: click HERE
Now- without further adieu:
Flawless make up application can many times be intimidating and expensive, but the truth is you don’t need a makeup artist to achieve that perfect airbrushed flawless face. I learned how to achieve professional looks on my own on a budget, and you can too!

(Ms. New York US and I before Miss United States—I did all of my own hair and make up)
Many pageant contestants spend hundreds on a makeup artist just for one make up application! For my first pageant, I actually fell into that trap and spent over $200 on makeup to finally realize that I can do this on my own. The truth is, I did not have the money to spend on a makeup artist by the time I was running for Miss Delaware United States. So with this, I decided to learn professional make up application and hair on my own (see my next blog post for hair!). Now for my photo shoots and appearances as Miss Delaware United States 2013, I do not have to worry about hiring a professional makeup artist every time or at all!

The first time I did my own Pageant Make Up ( Miss Delaware United States)
Professional makeup application is not as hard as it seems and you do not need the most expensive products to achieve the best looks. To start, you do need the right application products. A must have for everyone should be a good primer. Smashbox photo finish primer is one of my favorites, but with the price tag of $36.00, it does not exactly fit my budget. My favorite primer of great value is E.L.F Mineral Infused Face Primer. This primer is only $6.00 and it really goes a long way! Along with primer, the most important thing is a foundation brush for flawless application. I found a great stippling brush at ULTA for only $10 by Real Techniques. The one thing I do spend a little more on is foundation. I have sensitive skin, so I need to be careful in what I choose to use. My current favorite is Lorac Natural Performance Foundation ($36).


Now for the application. Application is the most important part of achieving that airbrushed look. I honestly learned how to do this through simply searching YouTube videos for foundation application. There are hundreds of videos that can teach you so many techniques. I can honestly say, I have tried them all and my favorite technique of all time has been stippling. Ever since I started using a stippling brush and this technique, I have gotten so many compliments on my makeup. I suggest searching YouTube for this and trying it out! I promise, people will be raving about your makeup! See this VIDEO. This guy is great! He has a bunch of different videos that can teach the best techniques.
To finish, contouring and highlighting is the most amazing thing that could have ever happened in makeup. I know contouring really sounds intimidating, but once you learn where to contour and highlight, it is SO easy! To start, I bought an E.L.F Studio Angled Blush Brush (for facial contouring) along with the E.L.F Studio Small Tapered Brush (for nose contouring). These were each only $3.00! My favorite duo to use for contouring and highlighting is Lorac TANtalizer Duo (Only $12!).


(Place highlighter where you see white, and contour where you see brown)
Contouring is made to go where there should be “shadows” on your face. An example of this would be under your cheeks to make your cheek bones appear larger, or under your jawline to make your jawline appear more pronounced. The most common places for contouring is the nose, cheek bones, and under the chin. Highlighting is made to go where you would like things more pronounced, so you would highlight near where you contoured to make the look complete. Many highlight right down the middle of the nose, the cheek bones, and the arches of the eyebrow. The application of contouring and highlighting is different for every face; however, most find great results with the most common approach, which I use as well. YouTube really is the BEST place to learn how exactly to conquer these techniques. Try out this VIDEO to see exactly where to apply:

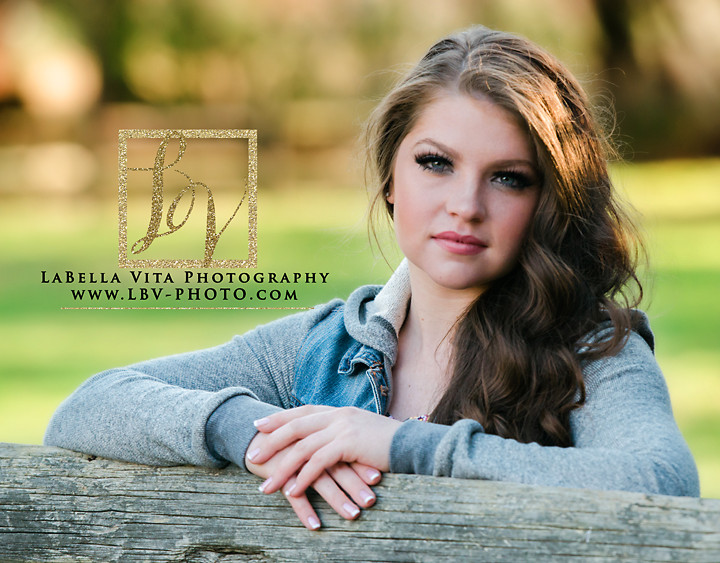
(My First Shoot with La Bella Vita Photography—Make Up and Hair all done by me!)
See, flawless makeup application is actually very simple! Try it at home and see how it comes out. Of course the more you try it, the better you will get! I already see a huge difference from the first time I tried these techniques at Miss Delaware US to my shoots with La Bella Vita Photography and at the National Pageant. Stay tuned for more posts about makeup application and even hair!

Miss United States Pageant

Close Up of Finished Make Up Before Miss United States
Taylor DeMario is a young, recent graduate from the University of Delaware. She is currently working for the National Multiple Sclerosis Society as their Development Coordinator. She has been awarded with Miss Photogenic at the Miss Delaware United States 2013 Pageant as well as the Best Interview Award in the Miss Delaware USA 2012 Pageant. Taylor currently holds the title of Miss Delaware United States 2013 and has devoted her reign to increasing awareness and donations for the National MS Society. She has appeared at many charitable events and community events such as parades and children’s activities. You can follow Taylor on her facebook page by clicking HERE.